


Introduction:
One of our clients started migrating the apps management to the new Azure DevOps Cloud Service Platform, as part of IT corporate strategy of moving towards digital platform transformation to the cloud that provides application management work item tracking, source control services, continuous integration, and continuous deployment services at a place.
As part of the transition, we are migrating the existing application’s source code from Microsoft Team Foundation Services (TFS) version control to the new Azure DevOps Cloud Git Repository Version Control system.
In this article, we are going to walk-through the Azure Repos, which is a set of version control tools to manage source code.
Azure Repos provides the following types of version control tools:
- Git
- Team Foundation Version Control (TFVC)
We shall discuss Git in detail in this article.
What is Git?
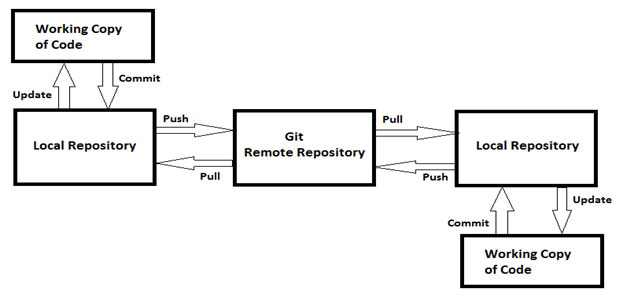
Git is a version control tool used for managing source code. It is used to track changes in the source code and allows multiple developers to work together at a time. Git is a distributed version control system where your local copy of code is a complete version control repository.
Advantages of Git:
- Branching and Merging: Multiple developers can simultaneously work on their branches of the local repository and merge the changes to the branches.
- Faster releases: We can commit the changes in our local repository and sync the copy of the repository to the copy of the repository in the server which makes Git perform faster
- Built-in integration: Visual Studio 2017 IDE has a built-in git repository tool to manage our code.
- Pull requests: Before merging the code changes into your main branch, we can review the changes with the team. Azure DevOps provides features to browse file changes, leave comments, inspect commits, view builds, and vote to approve the code.
- Branch policies: Your team can configure Azure DevOps to enforce consistent workflows and process across your team. Branch policies protect your important branches by preventing direct pushes, requiring reviewers, and ensuring clean builds.
A typical Git distributed version control system is shown as in the below diagram:
Now, we will create a new repository in Git under Azure DevOps web portal in the browser, and then we clone the same to our local repository in Visual Studio 2017.
Create a Git New Repository:
To create a new Git Repository first, we need to navigate to the Azure DevOps web portal and login with our Microsoft credentials.
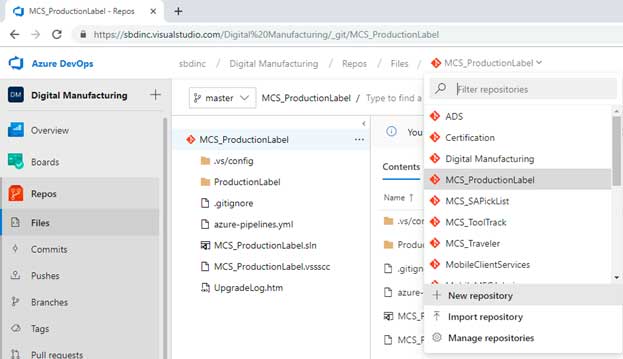
Once we login we need to click on the Repos link on the left side menu to navigate to the Repository Wizard and click on the dropdown next to the existing repository and click on New repository link.
A pop-up window for creating a new repository will be shown as below.
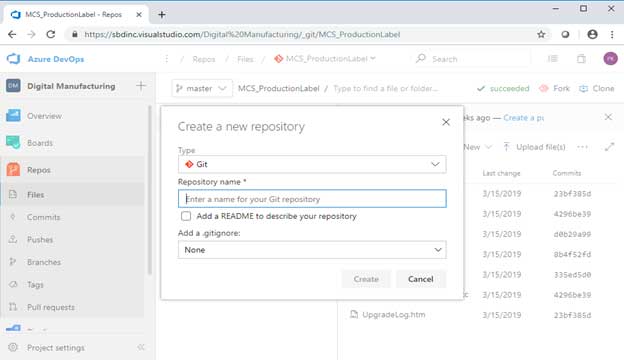
- Select Git option from the Type dropdown
- Enter the name of your Git repository
- Add a. gitignore: Select None from the dropdown
Clicking on Create Button will create a new repository with the given name.
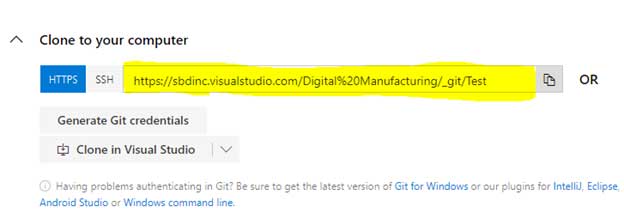
Clone:
Now we need to clone the repository to your local computer using Visual Studio 2017.
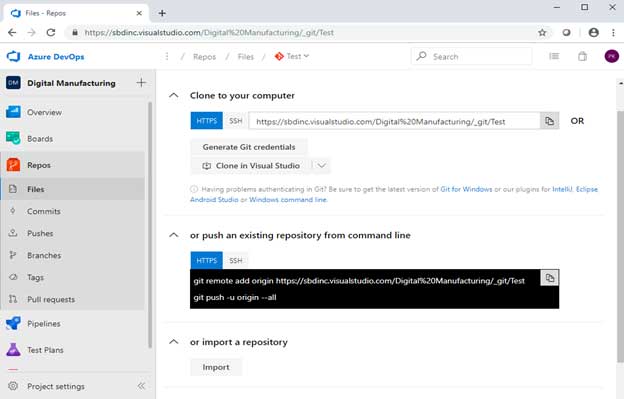
Copy the HTTPS URL under the Clone to your computer section to the clipboard.
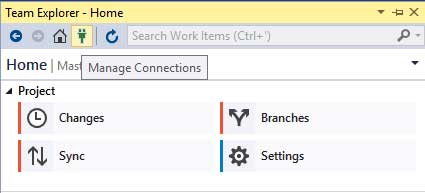
Manage Connections in Visual Studio 2017:
Open Visual Studio 2017 in your local computer and click on the “plug” icon under the Team Explorer window and select Manage Connections.
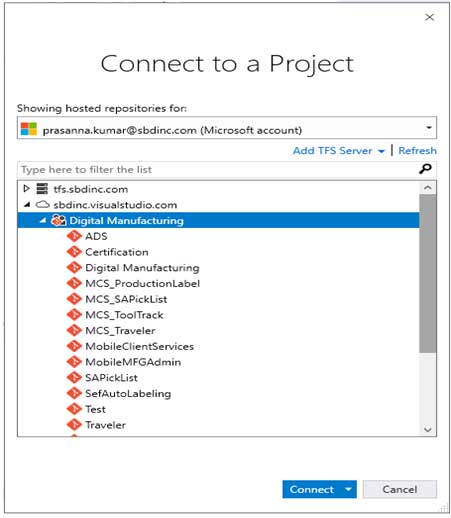
Manage Connections link will redirect to Connect to a Project window in which we need to select the Azure DevOps Project associated with the current Microsoft account login.
Clone in Visual Studio 2017:
Open Team Explorer and click on Clone under Local Git Repositories section:
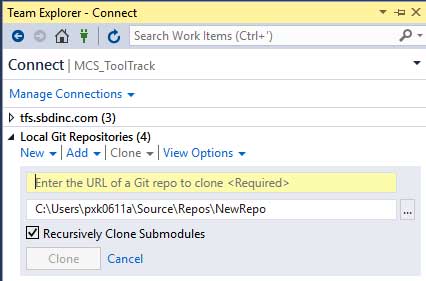
Now paste the HTTS URL copied from Azure DevOps web portal in the text box with “Enter the URL of a Git repo to clone .”
Select the local folder path to create a local repository and click on the Clone button.

Once the server copy of the repository is cloned with local git name, it shows the following success message.
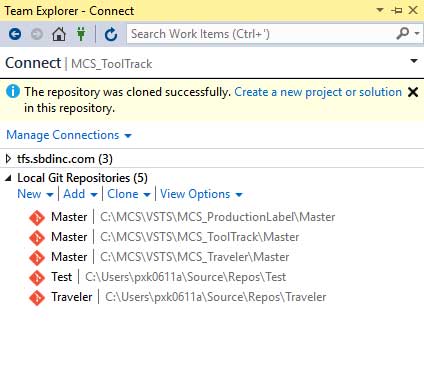
Now, we need to copy our existing Web Project Solution to Git local directory folder.
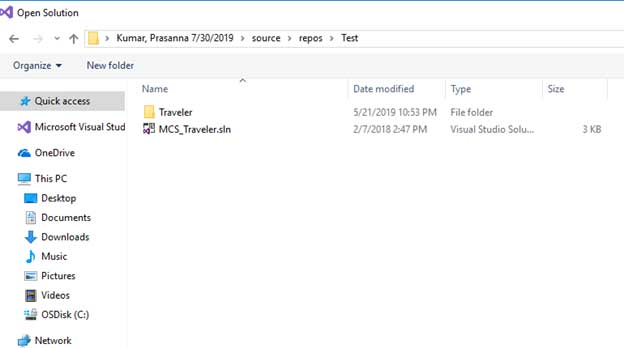
Commit Changes:
Once the existing project solution files are copied to the local git repository folder path, we can see the number of files to be ready for “commit and push” at the bottom right corner of Visual Studio or by clicking the Changes tab under Project section in Team Explorer.

Click on the Changes tab under the Project section, which redirects to show the changes made to project in the local repository.
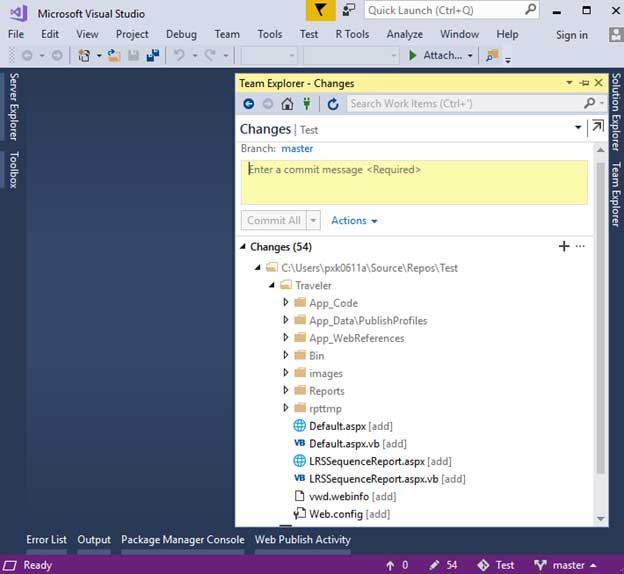
- Enter a commit message related to the changes.
- Select one of the following commit options from the dropdown:
- Commit All
- Commit All and Push
- Commit All and Sync
Commit All: Commit makes a record of the changes that you have made on your local machine. It does not mark the change in the remote repository.
Commit All and Push: Commit All makes the record of your changes and push it to the remote repository. i.e., any changes you have made are saved to the remote repository as well.
Commit All and Sync: First, it commits, second, it performs a pull (grabs the updated information from the remote repo). Finally, it pushes the changes to the remote repository.
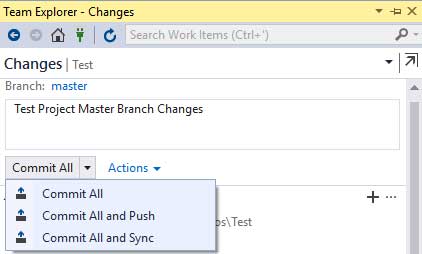
Select the option Commit and Push, and it makes a record of all the changes and Pushes the committed changes to the remote repository, i.e., Master origin branch in Azure DevOps Git Repository.
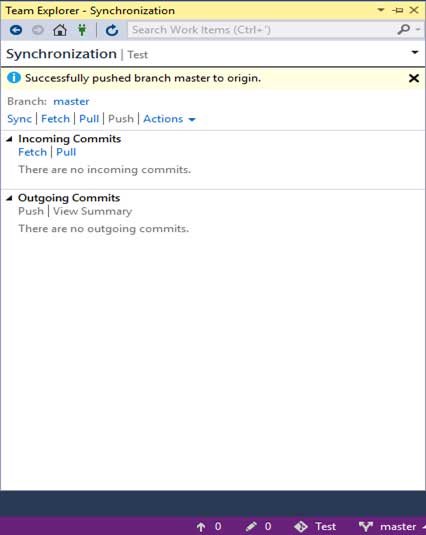
Now go back to the Azure DevOps web portal in the browser and refresh the screen, which reflects all the changes committed and pushed to the master branch.
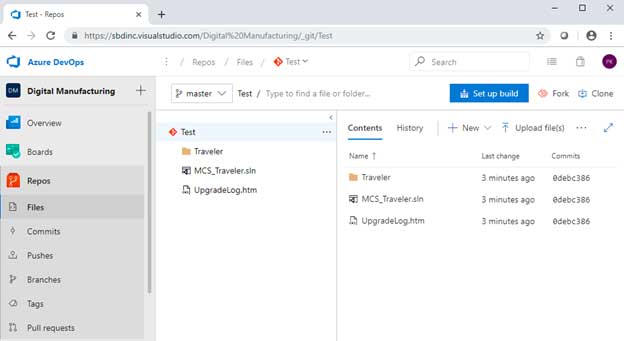
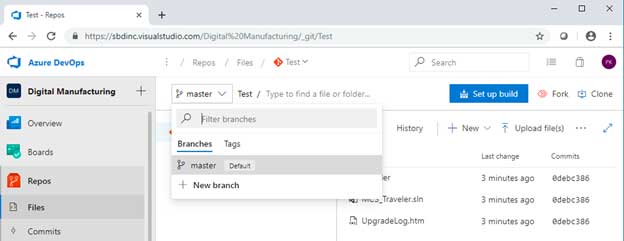
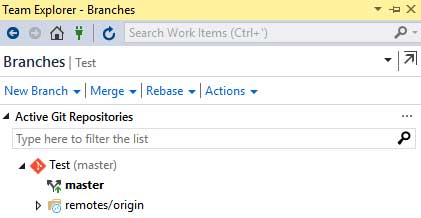
We can select the branch from the dropdown and master will be the default branch for the newly created Repository in Git.
Create New Branch:
To create a new branch called Development-2017 from master branch click on the “Branches” tab.
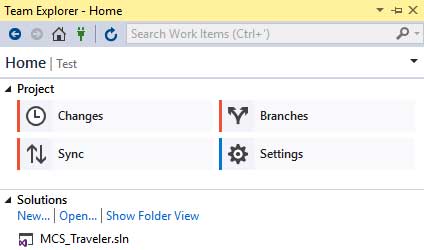
Once we click on the “Branches” tab, it redirects to the following Branches wizard in Team Explorer.
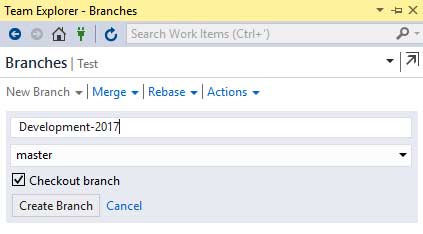
Click on “New Branch” button and Enter Branch name.
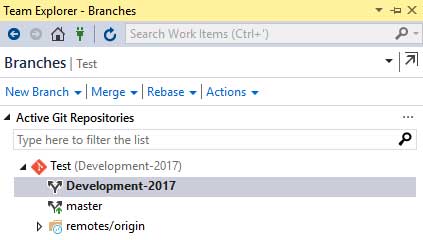
Once a new branch Development-2017 is created we can see the same in the following Branches wizard.
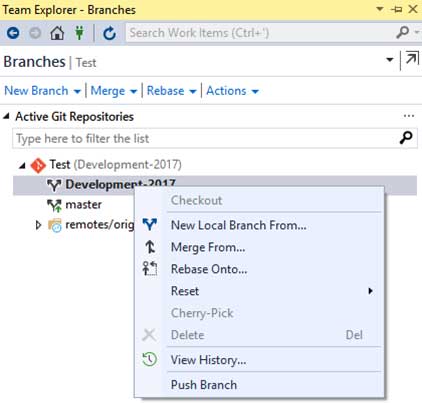
Push Branch:
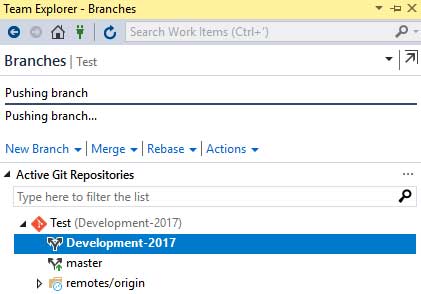
Once we create a branch in our local repository using Visual Studio 2017, we need to push the branch to the remote repository. In Team Explorer, Right-click on the Development-2017 branch and select “Push Branch” option from the pop-up menu.
Once we click on “Push Branch” it shows the progress as below:
Once pushed to the Azure DevOps Repository Branches, it shows the following status message:
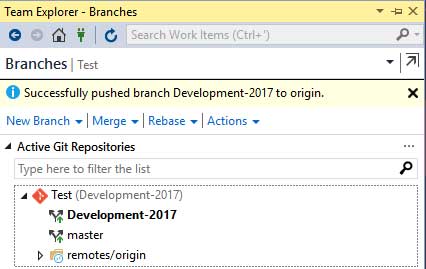
Now go back to Azure DevOps web portal in the browser and refresh the screen to see the pushed branch under the dropdown.
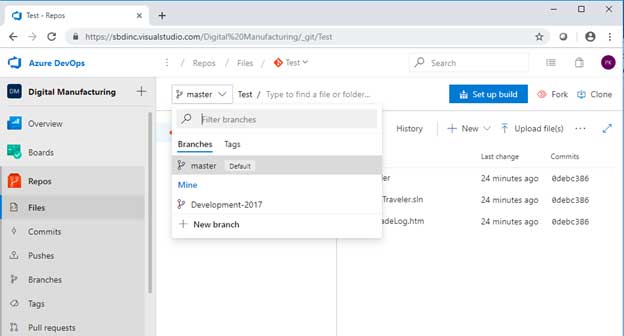
Similarly, we can create any number of branches from Visual Studio and Push the same to Azure DevOps remote/origin repositories.
Delete Branch:
To Delete a branch from the Repository in Azure DevOps web portal Repositories, click on the “Branches” tab in the left menu and click on the “Delete” icon.
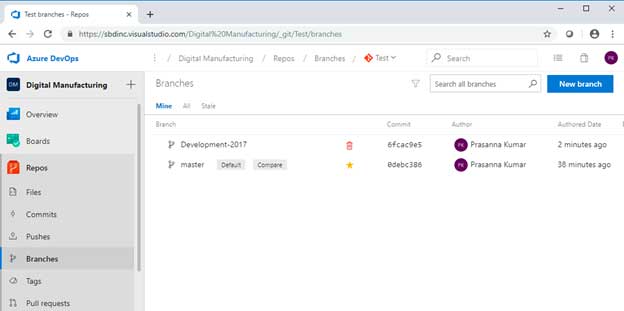
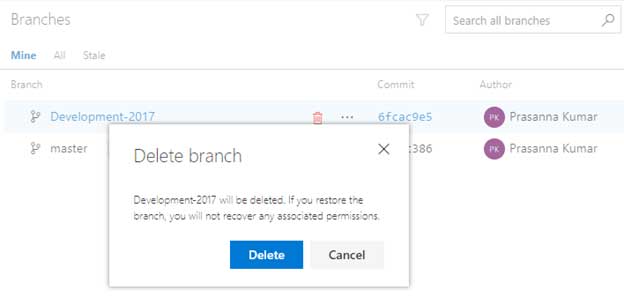
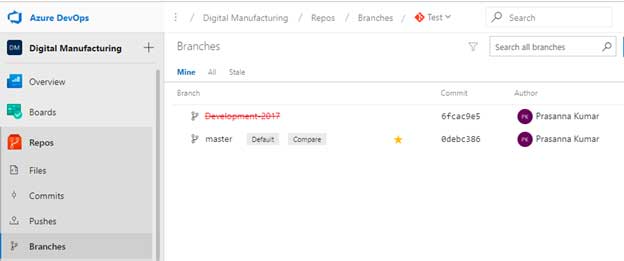
Click on the Delete button to delete the selected branch, and the following screen is displayed once the branch is deleted.
Conclusion:
In this blog, we have covered the topics how to create a repository in Azure DevOps Git, commit and push changes, sync changes with a master branch in remote repository server, creating branches from master and pushing the branches. We also covered how to delete a branch from the git repository in Azure DevOps web portal. In coming blogs, we will discuss on Continuous Integration and Continuous Deployment.

More From Author.


Related Posts.


From Data to Intelligence: How Fabric IQ Transforms Enterprise AI
Aarushi Trivedi Lalit Goyal


Unlock Data Editing Magic: Translytical Task Flows in Power BI
Lalit Goyal Prashant Atri


Unified Financial Data Platform: Empowering Modern Finance with Trust, Speed, and Scale
Phani Parashuram Srinivas Bhoopathi