

Introduction:
In continuation of my last Azure DevOps process blog in which, we covered the Scrum Board and Git Repository Management tasks. In this article, we will walk-through the Build Process Management for Continuous Integration (CI) Project with a specific branch to generate artifacts to deploy on the target servers.
Create a New Build Pipeline:
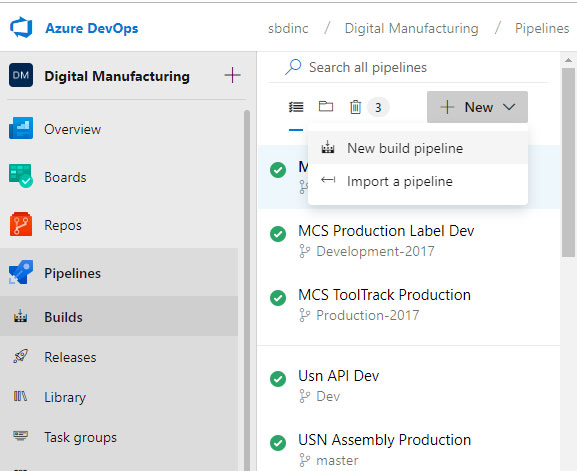
To create a new build pipeline click on Pipelines->Builds link then click on New button and select New build pipeline item from the drop-down menu.
Clicking on the Create new pipeline link will redirect to the following wizard:
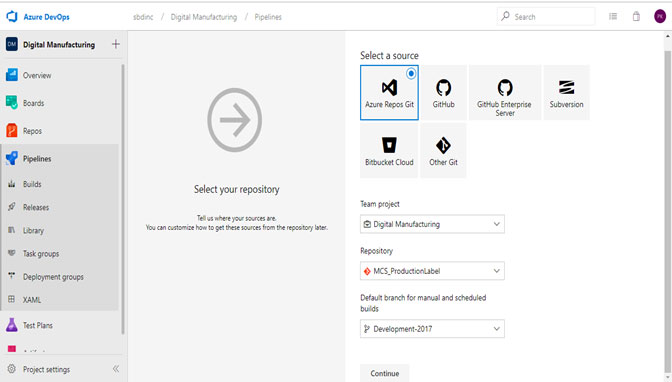
- Select a source as Azure Repos Git
- Team project
- Repository
- Default branch for manual and scheduled builds
- Click on Continue Button
Clicking on Continue Button will redirect to Select a Build definition template depending on the project to build from the following featured list of templates or Other templates.
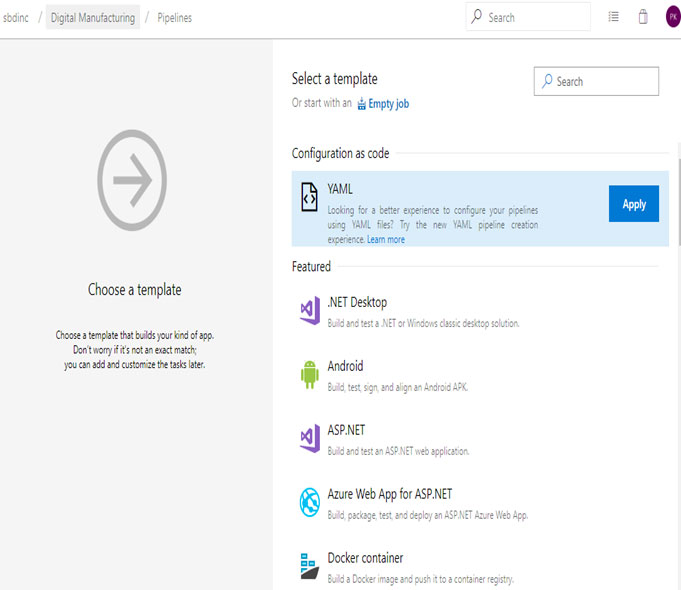
Search the name “ASP.NET” in the select template search box and select the ASP.NET template under the Featured list tab and click on the Apply button.

Clicking on Apply button redirects to the following ASP.NET Build Template wizard:

Under the Tasks tab, we need to specify the Build Pipeline details.
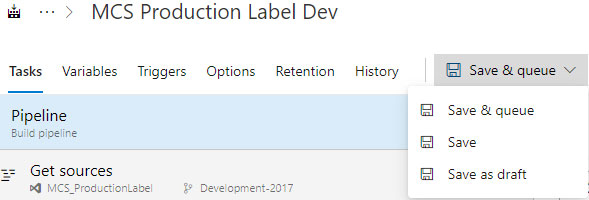
We can specify the Build definition name under the Name text box, and the name given as “MCS Production Label Dev.”

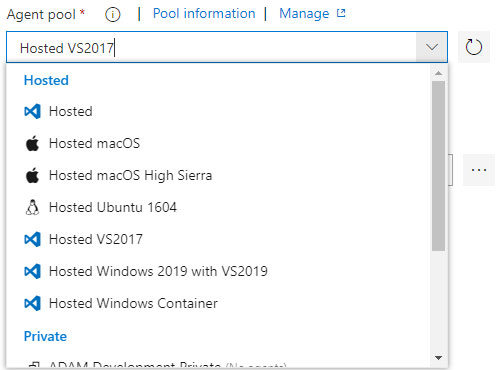
Now we need to search and select an Agent pool from the following drop-down:
Search the name “Hosted VS2017” and select the Hosted VS2017 agent pool.
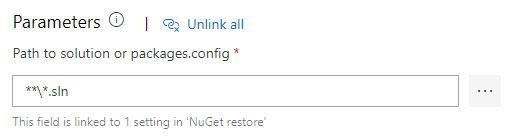
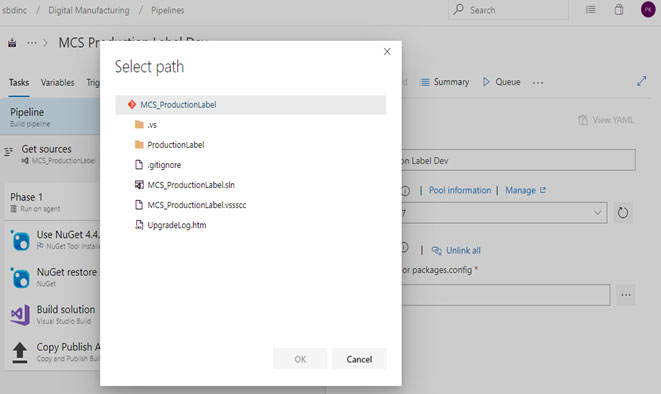
Now specify the path to the solution or package.config:
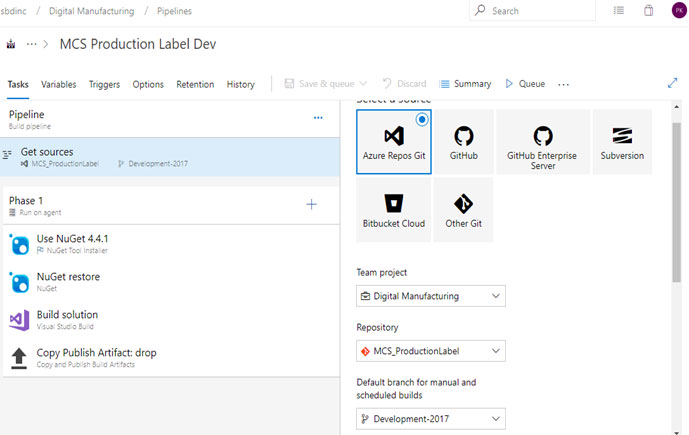
After filling the Build Pipeline details now click on Get Sources tab to see the Repository details in the following order as shown:
- Azure Repos Git option
- Team project from the Team Project drop-down
- Repository from the Repository drop-down
- Default branch for manual and scheduled builds
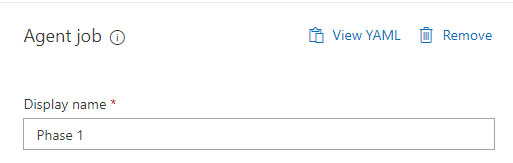
Now select the Agent Job tab under which we can add various tasks for the build process.
We can specify the Display name for the Agent Job as follows:
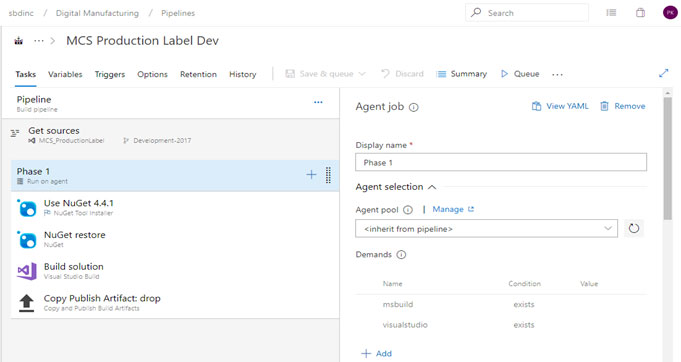
Click on the “+” button to add tasks for the Build pipeline under the Build Agent named as “Phase 1”.
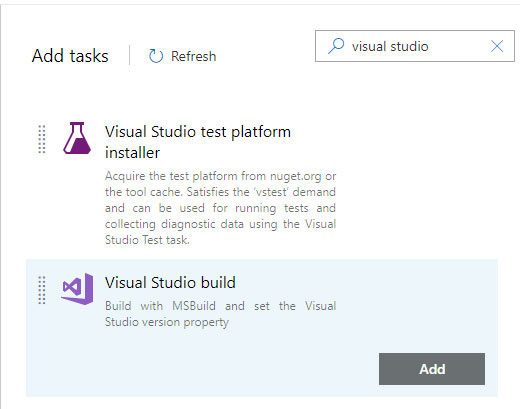
Search for the task “Visual Studio Build” by typing the phrase “visual studio” in the task search box and list of matching tasks will be displayed. Select Visual Studio Build task and click on the Add button to add the same.
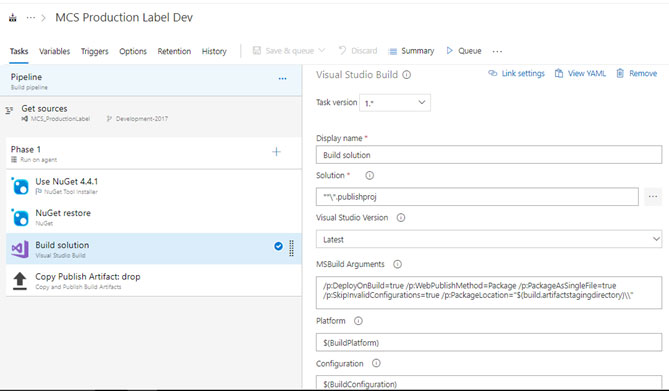
Now fill the required fields for the Visual Studio Build task like Display name, Solution, MS Build Arguments, Platform, and Configuration, etc.
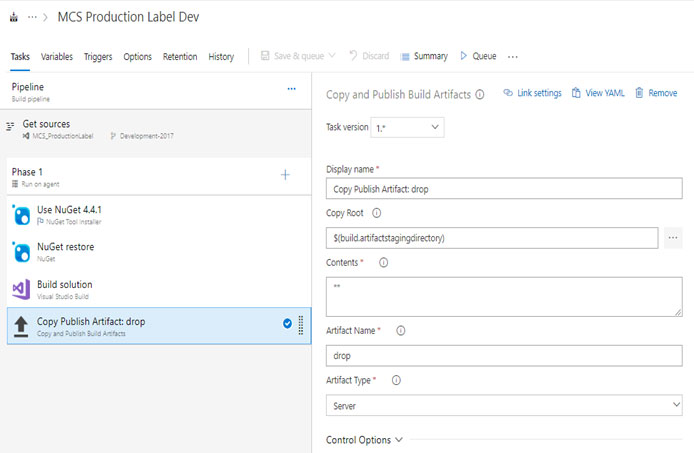
Now, add the next task Copy and Publish Build Artifacts and fill the required fields like Display Name, Contents, Artifact Name, Artifact Type, etc.
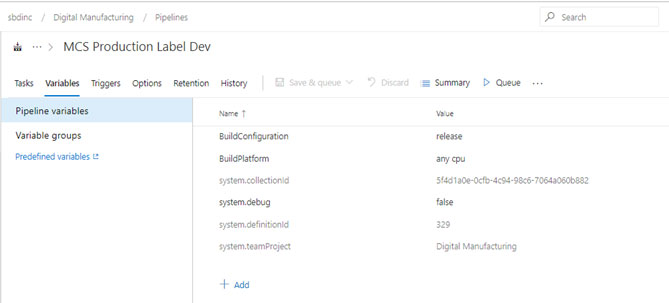
Go to Variables tab to define Pipeline variables, Variable groups and Predefined variables etc.
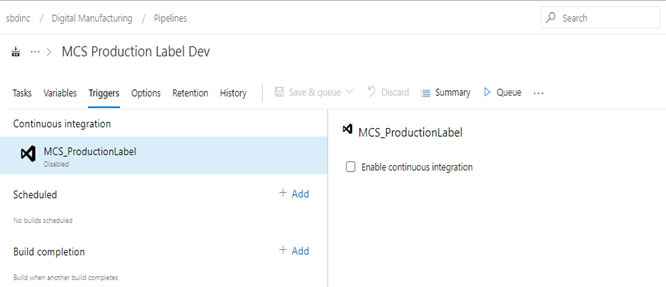
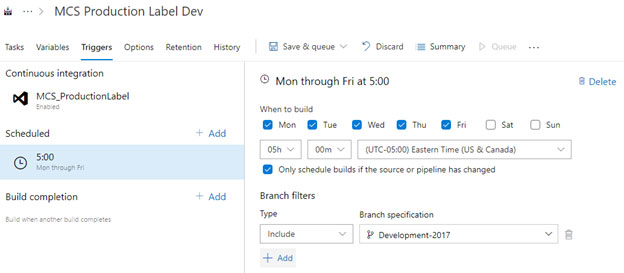
Go to the Triggers tab and click on the checkbox “Enable continuous integration” to automate the build.
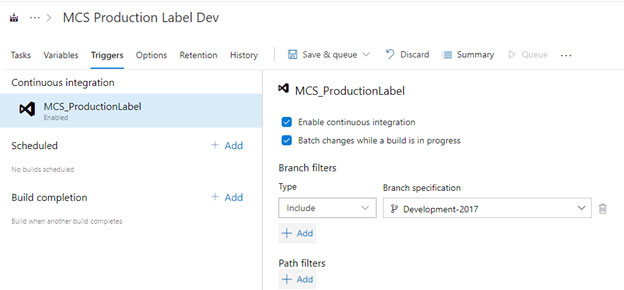
Clicking on the enable continuous integration checkbox displays the below screen with another option to choose Batch changes while a build is in progress. Also, Choose branch filters to include or exclude specific branches to build. This enables the continuous build process immediately after code commits done by the developer(s) in the Git Repository.
We can schedule the build process after code commit during continuous integration. Click on the “+ Add” button to add schedule tasks with the options like when to build by selecting a specific day and time with the time zone in which the build triggered to start.
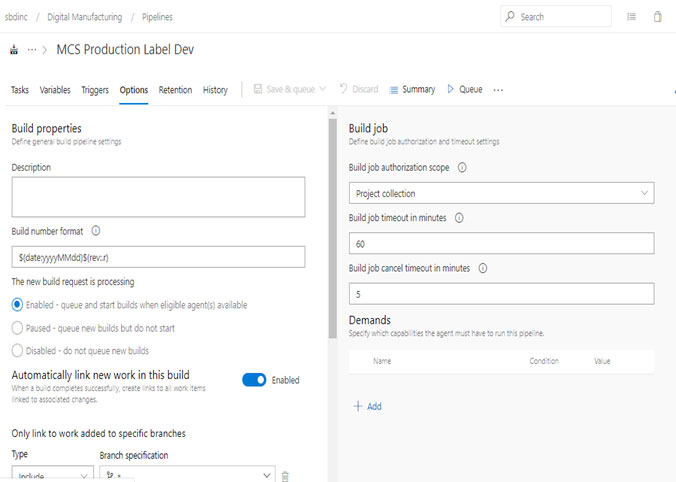
Go to the Options tab to specify different build properties, as shown in the below image.
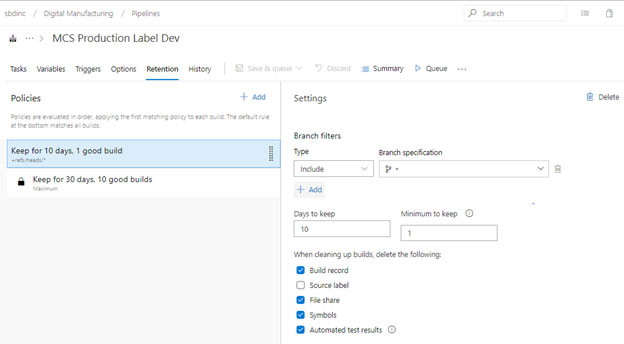
Go to Retention tab, where we can specify the Build Retention Policies:
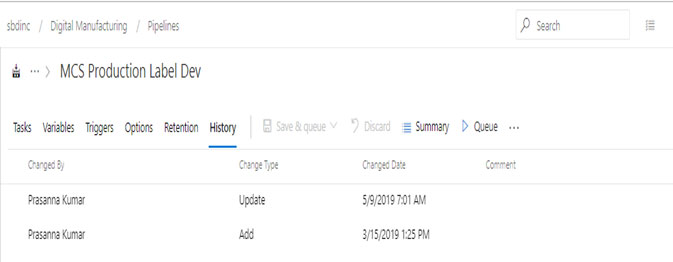
Go to the “History” tab where we can see the Build history.
Once we complete the Build Tasks and specifying other options, choose to click on the Save & Queue link from the following options:
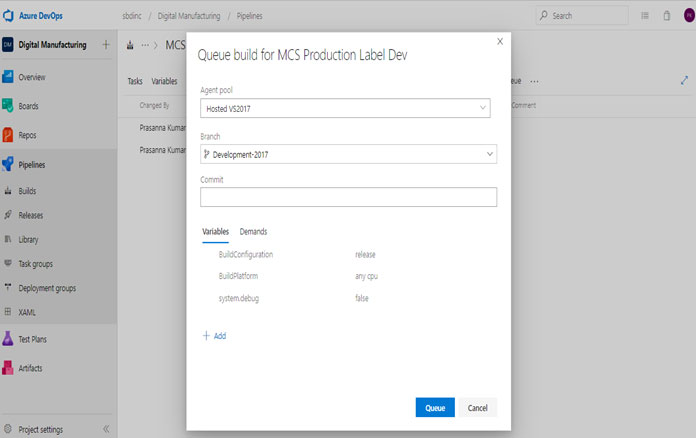
Clicking on Save & Queue option displays the following pop-up window and click on the “Queue” button to continue.
Once we click on Queue, we can see the message “Build #Build Number has been Queued.”

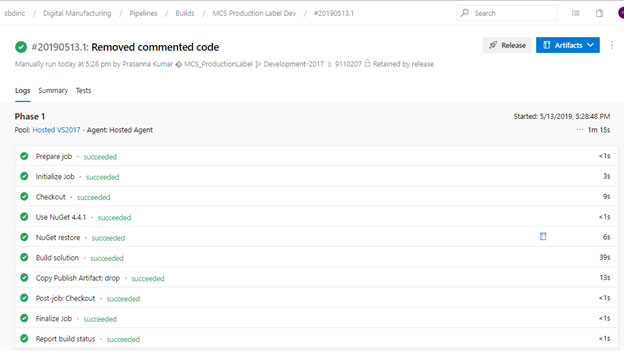
Clicking on the Build Number link redirects to the following Build log screen, and if the build is successful, we can see the “Artifacts” button enabled on the top right corner of this screen. Artifacts are set of compiled files generated to deploy in the target host servers using the Release task.
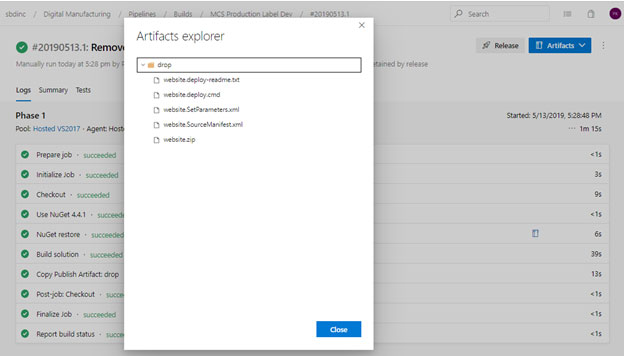
Clicking on the Artifacts button displays the following artifacts explorer pop-up with generated folders and files to publish.
Conclusion:
In this blog, we have covered how to create a Build task in Azure DevOps for a specific project branch version and build the solution to generate Artifacts to publish. In the next blog, we shall discuss on Continuous Deployment.

More From Author.


Related Posts.


From Data to Intelligence: How Fabric IQ Transforms Enterprise AI
Aarushi Trivedi Lalit Goyal


Unlock Data Editing Magic: Translytical Task Flows in Power BI
Lalit Goyal Prashant Atri


Unified Financial Data Platform: Empowering Modern Finance with Trust, Speed, and Scale
Phani Parashuram Srinivas Bhoopathi